Write for Us
Older entries
  1. How to Choose an Air Conditioner for Your Room

    by wpmh9nzyf6ocooig7 min read

    If you are standing in an electronics aisle or scrolling through online listings, overwhelmed by conflicting advice, this guide cuts through the noise. It is designed for homeowners and renters who want to confidently select an air conditioning unit that matches their room's size, usage patterns, and budget without being lost in technical jargon.

    Instead of just listing features, we walk through the logical sequence of decision-making. You will learn why specific measurements dictate your cooling capacity and how energy ratings translate into actual operating costs. By understanding the reasoning behind each choice, you can make a practical, informed decision that fits your living space efficiently.

    Assessing Your Room’s Cooling Needs

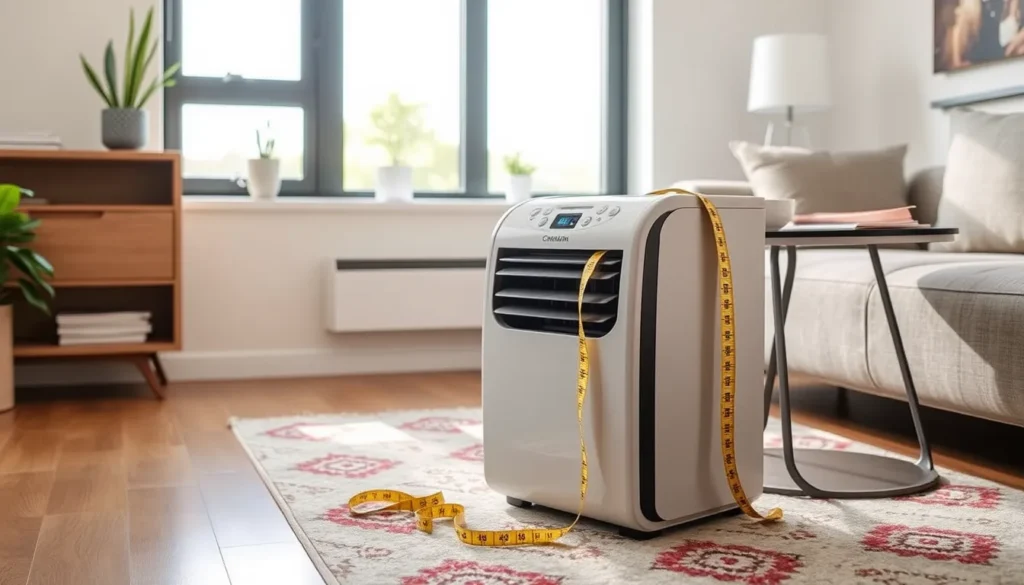
    Before browsing specifications, you must determine the actual cooling load your space requires. Start with basic geometry. Measure the length and width of the room in feet, then multiply them to find the square footage. If you have unusually high ceilings, factor in the height, as standard calculations often assume eight-foot ceilings. This baseline gives you a starting point, but several environmental factors will increase that number.

    Measuring a room for air conditioning size

    Direct sun exposure significantly impacts thermal gain. Rooms with large windows facing the afternoon sun need more capacity than shaded areas. Similarly, poor insulation or single-pane windows allow heat to penetrate, forcing the unit to work harder. Occupancy matters too; each person adds body heat to the environment. A bedroom used by two people requires more power than an empty office.

    This is where BTU (British Thermal Unit) comes in. A BTU measures the amount of heat a unit can remove from a room in one hour. It is the standard metric for cooling power. You do not want to guess this number. If you select a unit with too few BTUs, it will run constantly without reaching the desired temperature, leading to higher energy bills and wear. Conversely, an oversized unit will cool the room quickly but fail to dehumidify properly, leaving the air feeling muggy. Match the calculated load to the BTU rating to ensure the system cycles efficiently, maintaining both temperature and humidity levels comfortably.

    Selecting the Right Unit Type

    With the correct cooling capacity identified, the next decision involves the physical form factor of the unit. The choice between a Window Unit, a Split System, and a Portable AC dictates your installation effort, noise footprint, and overall cost.

    A Window Unit is the most straightforward option. It installs directly into an existing window frame, requiring minimal DIY work. However, this configuration often results in higher noise levels because the compressor and fan are located inside the room. Aesthetically, it occupies window space and may look bulky, which can be a concern in living areas where appearance matters.

    In contrast, a Split System, specifically a ductless mini-split, offers superior efficiency and quieter operation. The noisy compressor sits outdoors, while only the sleek indoor air handler is visible inside your room. This setup provides precise temperature control and better aesthetics. The trade-off is complexity; installing a split system requires drilling through walls for refrigerant lines and electrical connections. Professional installation is standard to ensure safety and maintain warranty coverage.

    Portable ACs offer the highest flexibility, as they can be moved from room to room. They require a window venting kit, which can be cumbersome. While they avoid permanent installation, they are generally the least efficient option. The exhaust hose creates a heat leak, reducing cooling performance. Additionally, the unit itself generates noise on the floor.

    Choose a window unit for budget-conscious DIY projects in single rooms. Opt for a split system if you prioritize long-term savings, silence, and a clean look, and are willing to invest in professional setup. Select a portable unit only if you need to cool multiple spaces sequentially or lack any window or wall space for other types.

    Understanding Energy Efficiency and Operating Costs

    Once you have selected a unit type, focus on efficiency ratings to predict long-term expenses. The SEER (Seasonal Energy Efficiency Ratio) rating indicates how efficiently a system converts electricity into cooling power over a typical cooling season. A higher number means the unit produces more cooling for less energy. While a high SEER unit costs more upfront, it reduces the load on your electrical grid and lowers monthly utility bills. Over several years, these cumulative savings can offset the initial premium, making efficient models a smarter financial choice for frequently used rooms.

    The core mechanism behind this efficiency is often Inverter Technology. Standard compressors operate in a binary mode: they turn on at full capacity to cool the room, then shut off completely once the desired temperature is reached. This constant cycling creates temperature swings and wastes energy during startup. Inverter compressors, however, adjust their motor speed continuously. They ramp down to a lower, steady pace once the room reaches the set temperature, maintaining comfort with minimal power draw. This smooth operation not only saves electricity but also reduces wear on the internal components.

    When budgeting, balance the purchase price against projected running costs. A slightly more expensive unit with superior SEER ratings and inverter technology will typically outperform a cheaper, standard model in efficiency. Calculate your estimated usage hours per day. If you plan to run the air conditioner continuously, the energy savings from a high-efficiency unit become significant. For occasional use, the difference in operating costs may be negligible, allowing you to prioritize lower upfront expenditure. Always compare the total cost of ownership rather than just the sticker price to make an informed decision that aligns with your long-term financial goals.

    Key Features That Impact Comfort and Usability

    Once you have settled on size and efficiency, focus on features that directly influence daily comfort. Programmable timers allow you to set specific on and off times, ensuring the room cools before you arrive or shuts down during sleeping hours to save energy. Sleep modes complement this by gradually raising the thermostat throughout the night, preventing the discomfort of waking up too cold while maintaining a consistent, quiet environment.

    For better indoor air quality, look for units with built-in air purification filters. These capture dust, pollen, and other particulates as the air circulates, which is particularly beneficial for individuals with allergies or respiratory sensitivities. While they do not replace dedicated air purifiers, they provide a convenient baseline for cleaner room air with minimal extra effort.

    Control convenience matters as much as the cooling itself. A reliable remote control is essential for adjusting settings without leaving your seat. For added flexibility, many modern Split Systems offer smartphone integration, allowing you to monitor temperature, check filter status, and adjust settings from your phone. This is especially useful if you return home unexpectedly and want to pre-cool the space or verify that the unit is operating correctly.

    Finally, consider noise levels, measured in decibels. Indoor units generally operate more quietly than outdoor units, but the difference is critical for bedroom use. A low-decibel indoor unit ensures that the background hum does not disrupt sleep or conversation, making it a key factor for anyone prioritizing a peaceful living space.

    Installation Considerations and Maintenance

    Before purchasing, verify that your installation site can support the chosen air conditioning unit. For a Window Unit, inspect the window frame’s structural integrity. The frame must be sturdy enough to bear the weight of the appliance without warping or compromising the seal. Measure the exact opening dimensions to ensure a snug fit, as gaps lead to significant energy loss and reduced cooling performance.

    If you are opting for a Split System, plan the placement of both indoor and outdoor components carefully. The indoor unit requires adequate wall or ceiling space for proper airflow and aesthetic integration. The outdoor condenser needs a stable, level surface away from high-traffic areas, with sufficient clearance for ventilation. Professional installation is highly recommended for split systems to ensure refrigerant lines are correctly routed and sealed, preventing leaks that could damage the compressor.

    Regardless of the type, proper sealing is non-negotiable. Air leaks around window units or wall penetrations allow warm outdoor air to infiltrate the room, forcing the unit to work harder and increasing electricity consumption. Use foam strips, weatherstripping, or mastic sealant to close these gaps completely.

    Regular maintenance preserves efficiency and extends the lifespan of your equipment. Clean or replace air filters every few weeks during peak usage periods. Clogged filters restrict airflow, causing the system to overheat and reducing cooling capacity. Additionally, check the drainage system monthly to ensure condensate is flowing freely. Blocked drains can cause water damage to your walls or ceiling. For inverter technology units, keeping the coils clean is particularly important to maintain their ability to modulate power efficiently. A simple annual professional inspection can identify minor issues before they become costly repairs.

  2. How to Choose a Router for a Busy Household: A Practical Guide

    by wpmh9nzyf6ocooig7 min read

    If your home Wi-Fi slows down when the video call starts, this guide helps you fix it. It targets households with multiple active users and devices. You will learn to calculate actual network load, not just count gadgets. The focus is on practical capacity planning and managing interference.

    Stop guessing and start matching hardware to real usage patterns. This approach prevents overbuying expensive gear you do not need or underbuying units that fail under pressure.

    You will get clear steps to select a router that maintains strong throughput and low latency. The goal is a stable connection for every user, simultaneously.

    Assess Your Household’s Actual Network Load

    Before looking at router specifications, you must understand exactly how your network is used. A high device count is less important than the intensity of data flow. Start by listing every device that connects to your Wi-Fi or Ethernet ports. Include smartphones, laptops, smart home hubs, streaming boxes, and computers. Next, identify your peak usage windows. Most households experience heavy load during evenings or weekends. Note the specific times when multiple users are active simultaneously.

    Distinguish between active and passive connections. Active usage involves real-time data transfer, such as video streaming, online gaming, or video calls. These tasks demand consistent throughput and low latency. Passive connections include background updates, email synchronization, or smart bulb status checks. These consume minimal bandwidth but require stable connectivity. A router might handle twenty passive devices easily but struggle with five active video streams. Focus on the number of active sessions during peak hours. This metric determines your true capacity needs.

    The expected result of this assessment is a clear profile of concurrent connection requirements. You will know exactly how many high-demand tasks occur at once. This prevents buying a router based on total device count alone. Instead, you select hardware capable of sustaining the specific load your household generates. This baseline guides your choice of Wi-Fi standard and congestion management features. It ensures the network remains responsive even when everyone is online. Skip this step, and you risk mismatching hardware to actual demand.

    Select the Right Wi-Fi Standard and Band Configuration

    Step 2: Compare Wi-Fi standards based on congestion handling, not just peak throughput. Wi-Fi 5 offers solid baseline performance but struggles when many devices transmit simultaneously. Wi-Fi 6 improves efficiency through better scheduling, reducing latency during heavy use. Wi-Fi 6E and 7 add new frequency bands, providing more airtime to separate traffic flows.

    For busy households, the goal is minimizing interference between active sessions. A newer standard allows the router to manage multiple simultaneous streams more effectively. This prevents one video call from slowing down another user’s browsing. The expected result is a network that remains responsive under load, avoiding bottlenecks that older standards cannot resolve.

    Next, evaluate band configuration. Dual-band routers use 2.4 GHz for range and 5 GHz for speed. Tri-band models add a second 5 GHz band, which is ideal for separating IoT devices from high-priority tasks. If your household has more than ten active devices, a tri-band system or a Mesh system with dedicated backhaul often outperforms a single dual-band unit. This setup ensures that bandwidth is allocated efficiently without one type of traffic starving the rest.

    Choose a standard that matches your peak concurrent usage. If you identified heavy simultaneous streaming and gaming in Step 1, prioritize Wi-Fi 6 or higher. This ensures the hardware can handle the specific traffic patterns you measured, rather than relying on theoretical maximum speeds that rarely occur in real home environments.

    Match Router Coverage to Your Home Layout

    Measure Your Floor Plan and Obstacles

    Calculate the total square footage of your home, including basements and upper levels. Note the location of heavy physical barriers such as brick walls, concrete foundations, and large metal appliances. These materials significantly attenuate Wi-Fi signals, reducing throughput and increasing latency in distant rooms. A single router is typically sufficient for open-plan layouts or smaller homes where the device can be centrally located. However, if your home features multiple floors, thick masonry, or an expansive footprint, a single unit will struggle to maintain consistent bandwidth across all areas.

    Determine the Necessary Hardware Configuration

    Map the signal range from a central point. If you identify areas where the connection drops or speeds plummet, consider a mesh system. Mesh networks use multiple nodes to create a unified network, eliminating dead zones without the complexity of traditional extenders. Do not overbuy; adding extra nodes to a small apartment is unnecessary cost. Conversely, underbuying leads to frustration as devices disconnect or buffer. The goal is a coverage plan that ensures every corner of your living space receives a stable signal. Place your primary router or main mesh node in the center of your home, elevated and away from obstructions. This strategic placement maximizes dual-band signal integrity, ensuring that high-bandwidth activities like video calls and gaming remain smooth regardless of where you are in the house. Validate your plan by checking signal strength in the remotest corners before finalizing your purchase.

    Prioritize Congestion Management Features

    Once coverage is secured, you must manage how the router handles traffic when multiple devices compete for bandwidth. This is where congestion management features determine whether your network remains responsive or stalls under load. Focus specifically on QoS (Quality of Service) and MU-MIMO capabilities, as these tools directly address latency spikes during peak usage.

    QoS allows you to assign priority levels to different types of data. Without it, a large background download can consume available throughput, causing video calls to pixelate or online gaming to lag. With QoS enabled, the router identifies critical traffic—such as VoIP packets or real-time streams—and ensures it reaches its destination with minimal latency, even if other devices are saturating the connection. This prevents the “bufferbloat” effect that makes a fast connection feel slow during busy hours.

    MU-MIMO complements this by allowing the router to communicate with multiple devices simultaneously rather than sequentially. In a busy household, traditional routers switch rapidly between users, creating micro-delays that accumulate under heavy load. Multi-user MU-MIMO maintains separate data streams for each device, improving overall efficiency and reducing the waiting time for each client. The expected result is a stable, consistent experience where critical tasks remain smooth and responsive, regardless of how many other devices are active. Verify that the router’s QoS implementation is straightforward to configure, ensuring you can easily designate which applications or devices receive top priority without complex technical setup.

    Common Mistakes That Lead to Poor Performance

    Buying Based on Advertised Speed

    Marketing materials often highlight maximum theoretical throughput, which rarely translates to real-world bandwidth for a busy household. A router labeled “Gigabit” may still struggle if its processor cannot handle simultaneous connections. This mismatch leads to underbuying, where the hardware saturates quickly during peak usage times. Instead of chasing headline numbers, focus on the processor’s ability to manage concurrent clients. Check for reviews that test multi-device scenarios rather than single-stream speed tests. The corrective action is to prioritize consistent latency over peak speed, ensuring the router maintains stable performance even when ten or more devices are streaming or downloading simultaneously.

    Ignoring Router Placement

    Placing a router in a closet, basement, or behind heavy furniture significantly degrades signal strength and increases latency. Wi-Fi signals weaken through walls and metal objects, creating dead zones that no amount of speed can fix. Many users assume the router works best in the center of the house, but physical obstructions matter more than ideal geometric positioning. To correct this, position the device in a central, open location, ideally elevated on a shelf. Avoid placing it near microwaves or cordless phone bases, which operate on similar frequencies and cause interference. Proper placement often yields better results than upgrading to a more expensive model, as it ensures the radio waves reach all devices with minimal obstruction.

    Assuming More Antennas Equal Better Performance

    The number of external antennas does not directly correlate with better coverage or speed. Antennas are only one component of the radio design; a router with four weak antennas may perform worse than one with two optimized ones. This misconception leads to overbuying, where consumers pay a premium for aesthetics rather than capability. The corrective action is to look at the specific Wi-Fi standard and band configuration, such as dual-band support, rather than counting antenna tips. Focus on the internal radio quality and beamforming capabilities, which determine how effectively the router directs signals to specific devices. Prioritizing these technical features ensures you invest in hardware that genuinely improves network stability and reduces dropped connections in crowded environments.